Introduction:
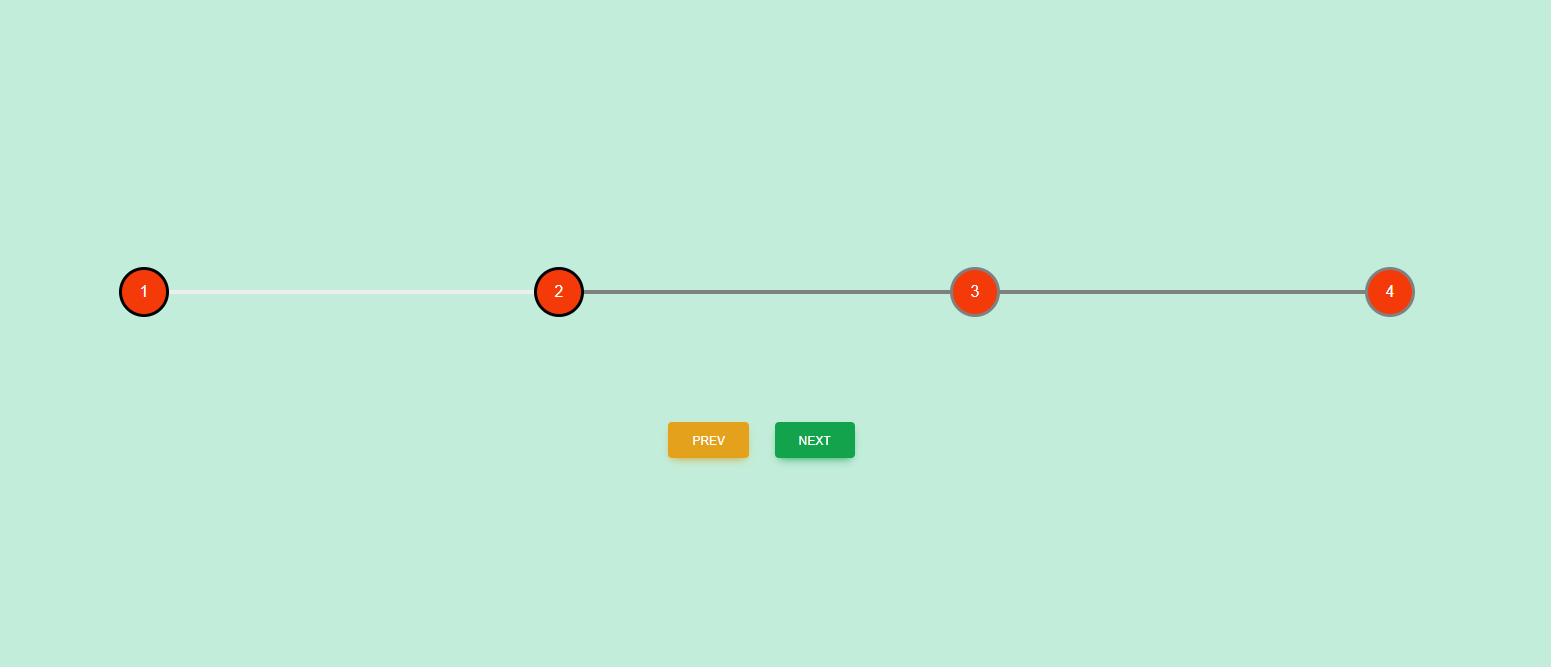
Hello friends, today I will create simple form steps. This is very useful for users. If the form is very long, then divide it into multiple steps. This progress bar is very useful for form filling.
This is the index.html file code.
                <!DOCTYPE html>
                <html lang="en">
                  <head>
                    <meta charset="UTF-8" />
                    <meta name="viewport" content="width=device-width, initial-scale=1.0" />
                    <link rel="stylesheet" href="style.css" />
                    <link rel="stylesheet" href="css/mdb.min.css" />
                    <title>coding30.com | Progress Steps</title>
                  </head>
                  <body style="background-color: #c2edda;">

                    <div class="container">
                      <div class="progress-container">
                        <div class="progress" id="progress"></div>
                        <div class="circle active">1</div>
                        <div class="circle">2</div>
                        <div class="circle">3</div>
                        <div class="circle">4</div>
                      </div>
                      <button  id="prev" class="btn btn-warning me-3"> Prev </button>
                      <button  id="next" class="btn btn-success me-3"> Next </button>
                    </div>

                    <script src="script.js"></script>
                  </body>
                </html>
This is the style.css file code.
                @import url("https://fonts.googleapis.com/css2?family=Muli&display=swap");

                :root {
                  --line-border-fill: black;
                  --line-border-empty: gray;
                }

                * {
                  box-sizing: border-box;
                }

                body {
                  font-family: "Muli", sans-serif;
                  background-color: #0049B7;
                  display: flex;
                  align-items: center;
                  justify-content: center;
                  height: 100vh;
                  overflow: hidden;
                  margin: 0;
                }

                .container {
                  text-align: center;
                }

                .progress-container {
                  display: flex;
                  justify-content: space-between;
                  position: relative;
                  margin-bottom: 100px;
                  max-width: 100%;
                }

                .progress-container::before {
                  content: "";
                  background-color: var(--line-border-empty);
                  position: absolute;
                  top: 50%;
                  left: 0;
                  transform: translateY(-50%);
                  height: 4px;
                  width: 100%;
                  z-index: -1;
                }

                .progress {
                  background-color: var(--line-border-fill);
                  position: absolute;
                  top: 50%;
                  left: 0;
                  transform: translateY(-50%);
                  height: 4px;
                  width: 0%;
                  z-index: -1;
                  transition: 0.4s ease;
                }

                .circle {
                  background-color: #f43a09;
                  color: #ffffff;
                  border-radius: 50%;
                  height: 50px;
                  width: 50px;
                  display: flex;
                  align-items: center;
                  justify-content: center;
                  border: 3px solid var(--line-border-empty);
                  transition: 0.4s ease;
                  animation: border-fill 1s linear forwards;
                }

                .circle.active {
                  border-color: var(--line-border-fill);
                }

                .btn {
                  background-color: var(--line-border-fill);
                  color: #fff;
                  border: 0;
                  border-radius: 6px;
                  cursor: pointer;
                  font-family: inherit;
                  padding: 8px 30px;
                  margin: 5px;
                  font-size: 14px;
                }

                .btn:active {
                  transform: scale(0.98);
                }

                .btn:focus {
                  outline: 0;
                }

                .btn:disabled {
                  background-color: var(--line-border-empty);
                  cursor: not-allowed;
                }

                @keyframes border-fill {
                  0% {
                    transform: scale(0);
                  }
                  100% {
                    transform: scale(1);
                  }
                }
This is the script.js file code.
          const progress = document.getElementById("progress");
          const prev = document.getElementById("prev");
          const next = document.getElementById("next");
          const circles = document.querySelectorAll(".circle");

          let currentActive = 1;

          next.addEventListener("click", () => {
          currentActive++;
          if (currentActive > circles.length) currentActive = circles.length;
          update();
          });

          prev.addEventListener("click", () => {
          currentActive--;
          if (currentActive < 1) currentActive = 1;
          update();
          });

          const update = () => {
          circles.forEach((circle, index) => {
          if (index < currentActive) circle.classList.add("active");
          else circle.classList.remove("active");
          });
          const actives = document.querySelectorAll(".active");
          progress.style.width =
          ((actives.length - 1) / (circles.length - 1)) * 100 + "%";
          if (currentActive === 1) prev.disabled = true;
          else if (currentActive === circles.length) next.disabled = true;
          else {
          prev.disabled = false;
          next.disabled = false;
          }
          };
Preview...

Explanation:
HTML
In the code, we create four circle using HTML and css tags and create two buton name is pre and next.CSS
In the code, CSS styles the form for a user-friendly appearance and make look and feel better.Javascript
In the code, Javascript using for perform the click action. if user click next button then progress baar shift right direction and if click prev button then progressbar shift left direcrtion.